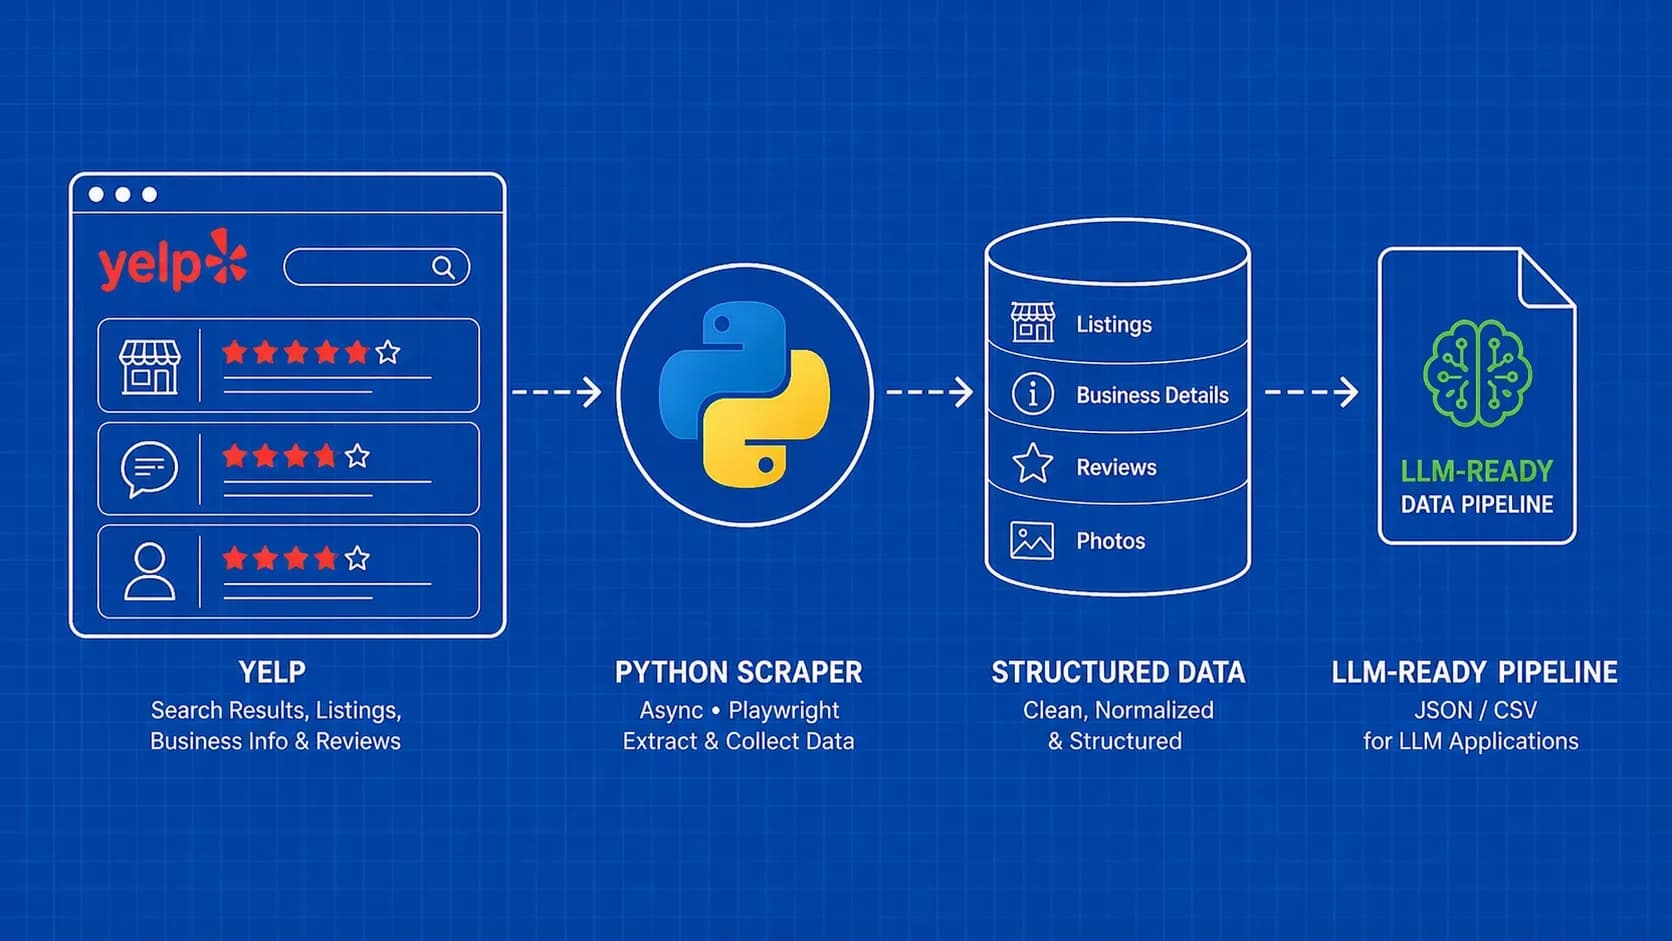
TL;DR: This guide walks you through building a complete Yelp scraper in Python, covering search results, business details, and reviews with working code. You'll also learn how to handle anti-bot protections, export data to CSV or JSON, and feed scraped reviews into an LLM for sentiment analysis, something no other Yelp scraping tutorial covers.
Introduction
Yelp holds one of the richest collections of local business data on the web: ratings, reviews, hours, categories, photos, and more, all tied to millions of businesses across hundreds of cities. If you need to understand how to scrape Yelp programmatically, Python is the most practical tool for the job.
Web scraping Yelp means extracting structured data from Yelp's public pages (typically search results, individual business listings, and user reviews) using HTTP requests and HTML parsing instead of manual copy-paste. Whether you're building a competitive intelligence dashboard, monitoring review sentiment, or generating leads from local directories, the underlying workflow is the same: fetch the page, parse the HTML, and store the results.
This tutorial gives you a full end-to-end project. You'll start with search result scraping, move to business detail extraction, then tackle review collection with pagination. From there, we cover anti-bot strategies, async scaling, data export, and a unique workflow for piping Yelp data into an LLM for automated summarization. Every code snippet is runnable, and every section explains the "why" alongside the "how."
Why Scrape Yelp? Business Use Cases Worth Building For
Before diving into code, it's worth understanding why Yelp data is so valuable. Yelp isn't just a review site; it's a structured directory with granular signals that are hard to find elsewhere. Here are the use cases that make scraping Yelp worth the engineering effort.
Competitive intelligence and benchmarking. If you run a restaurant, salon, or any local service business, Yelp reviews tell you exactly what customers love (and hate) about your competitors. Scraping star ratings, review counts, and response rates across a category lets you benchmark your business against the local landscape.
Review monitoring and sentiment analysis. Tracking reviews over time reveals trends: are customers complaining more about wait times this quarter? Scraped Yelp reviews feed directly into sentiment analysis pipelines, giving you quantitative signals from qualitative feedback.
Lead generation. Yelp listings include business names, phone numbers, addresses, and categories. For B2B sales teams targeting local businesses (think POS system vendors or marketing agencies), a Yelp scraper is a lead generation engine.
Local SEO audits. Comparing your Yelp listing's completeness (photos, hours, categories, response rate) against top-ranked competitors reveals gaps in your local presence.
Market research and site selection. Launching a new location? Scrape Yelp to map competitor density, average ratings, and review volume by neighborhood. This data feeds directly into site selection models.
The point is that learning how to scrape Yelp isn't an academic exercise. The data powers real business decisions.
Prerequisites and Project Setup
You'll need Python 3.9 or later. Create a new project directory and install the core dependencies:
pip install requests beautifulsoup4 lxml
Here's what each package does:
- requests: handles HTTP calls to Yelp's pages
- beautifulsoup4: parses the returned HTML into a navigable tree
- lxml: a fast HTML/XML parser that BeautifulSoup uses as its backend
For later sections, you'll also want:
pip install httpx openai
httpx gives you async HTTP support for concurrent scraping, and openai (or any LLM client) powers the data-to-insights pipeline we'll build at the end.
Create a scraper.py file and add the standard imports:
import requests
from bs4 import BeautifulSoup
import csv
import json
import time
import random
That's your foundation. Every section below builds on this setup.
Scraping Yelp Search Results
The first step in any Yelp scraping project is collecting business listings from search result pages. When you search for something like "pizza" in "New York, NY" on Yelp, the URL follows a predictable pattern:
https://www.yelp.com/search?find_desc=pizza&find_loc=New+York%2C+NY&start=0
The start parameter controls pagination, incrementing by 10 for each new page. Let's build a scraper that collects listings across multiple pages.
def scrape_search_results(query, location, max_pages=5):
    results = []
    headers = {
        "User-Agent": "Mozilla/5.0 (Windows NT 10.0; Win64; x64) "
                       "AppleWebKit/537.36 (KHTML, like Gecko) "
                       "Chrome/120.0.0.0 Safari/537.36",
        "Accept-Language": "en-US,en;q=0.9",
    }

    for page in range(max_pages):
        offset = page * 10
        url = (
            f"https://www.yelp.com/search?"
            f"find_desc={query}&find_loc={location}&start={offset}"
        )
        response = requests.get(url, headers=headers)

        if response.status_code != 200:
            print(f"Blocked or error on page {page}: {response.status_code}")
            break

        soup = BeautifulSoup(response.text, "lxml")
        cards = soup.select('[data-testid="serp-ia-card"]')

        if not cards:
            break

        for card in cards:
            name_tag = card.select_one("a.css-19v1rkv")
            rating_tag = card.select_one('[aria-label*="star rating"]')
            review_count_tag = card.select_one("span.css-chan6m")

            results.append({
                "name": name_tag.get_text(strip=True) if name_tag else None,
                "url": "https://www.yelp.com" + name_tag["href"] if name_tag else None,
                "rating": rating_tag["aria-label"] if rating_tag else None,
                "review_count": review_count_tag.get_text(strip=True) if review_count_tag else None,
            })

        time.sleep(random.uniform(2, 5))

    return results
A few things to note about the selector strategy. Yelp's class names are dynamically generated (those css-* strings), so they can change between deploys. The data-testid attributes tend to be more stable because they're used for internal testing. Always verify your selectors against the live page before running at scale.
Yelp also exposes a search snippet endpoint that may return JSON directly, which would skip HTML parsing entirely. However, the availability and structure of this endpoint can change without notice, so the HTML approach above is the reliable baseline.
The pagination loop increments start by 10 each iteration and stops when no more listing cards are found. The random delay between requests is essential for avoiding rate limits, something we'll cover in detail later.
Extracting Business Details from Yelp Listing Pages
Search results give you names and ratings, but individual business pages hold the really valuable data: full address, phone number, hours of operation, categories, price range, and more. Here's how to extract business data from Yelp listing pages.
def scrape_business_details(business_url, headers):
    response = requests.get(business_url, headers=headers)
    if response.status_code != 200:
        return None

    soup = BeautifulSoup(response.text, "lxml")

    def safe_text(selector):
        tag = soup.select_one(selector)
        return tag.get_text(strip=True) if tag else None

    # Extract business_id from meta or script tags for API use
    meta_biz = soup.select_one('meta[name="yelp-biz-id"]')
    business_id = meta_biz["content"] if meta_biz else None

    details = {
        "business_id": business_id,
        "name": safe_text("h1"),
        "rating": None,
        "phone": safe_text('[data-testid="phone-info"] p'),
        "address": safe_text("address"),
        "categories": [],
        "hours": {},
    }

    # Star rating from aria-label
    rating_el = soup.select_one('[aria-label*="star rating"]')
    if rating_el:
        details["rating"] = rating_el["aria-label"]

    # Categories
    cat_links = soup.select('span.css-1xfc281 a')
    details["categories"] = [a.get_text(strip=True) for a in cat_links]

    # Hours table
    hours_rows = soup.select("table.hours-table tr")
    for row in hours_rows:
        cols = row.select("td, th")
        if len(cols) >= 2:
            day = cols[0].get_text(strip=True)
            time_range = cols[1].get_text(strip=True)
            details["hours"][day] = time_range

    return details
The business_id extracted from the meta tag is particularly useful. Yelp uses this ID internally, and it can serve as a key for deduplication or for constructing URLs to review endpoints. When you're scraping Yelp business data at scale, having a stable identifier per business is critical for maintaining clean datasets.
Keep in mind that Yelp's HTML structure varies slightly depending on the business category. A restaurant page has a menu section, while a plumber's page does not. Your parsing code should handle missing elements gracefully (that's what the safe_text helper does). Check each selector return value before trying to access attributes or text.
Scraping Yelp Reviews at Scale
Reviews are often the most valuable part of Yelp data extraction. Each review includes the reviewer's name, star rating, date, and the full text, which is exactly what you need for sentiment analysis or competitive monitoring.
Yelp paginates reviews with a start query parameter, typically showing 10 reviews per page. Here's a scraper that walks through review pages:
def scrape_reviews(business_url, max_pages=10, headers=None):
    reviews = []

    for page in range(max_pages):
        offset = page * 10
        url = f"{business_url}?start={offset}&sort_by=date_desc"
        response = requests.get(url, headers=headers or {})

        if response.status_code != 200:
            print(f"Review page {page} returned {response.status_code}")
            break

        soup = BeautifulSoup(response.text, "lxml")
        review_containers = soup.select('[data-testid="review"]')

        if not review_containers:
            break

        for container in review_containers:
            user_tag = container.select_one("a.css-19v1rkv")
            rating_tag = container.select_one('[aria-label*="star rating"]')
            date_tag = container.select_one("span.css-chan6m")
            text_tag = container.select_one("p.comment__09f24__D0cxf span")

            reviews.append({
                "user": user_tag.get_text(strip=True) if user_tag else None,
                "rating": rating_tag["aria-label"] if rating_tag else None,
                "date": date_tag.get_text(strip=True) if date_tag else None,
                "text": text_tag.get_text(strip=True) if text_tag else None,
            })

        time.sleep(random.uniform(2, 5))

    return reviews
Handling dynamic review loading. Yelp sometimes loads reviews through JavaScript after the initial page render. If your requests-based scraper returns fewer reviews than you see in the browser, the page is likely hydrating review content client-side. In that case, you have two options: use a headless browser (like Playwright or Puppeteer) to render JavaScript, or look for the underlying API calls the page makes.
There are indications that Yelp uses a GraphQL endpoint internally to fetch review data in structured JSON format. If available, this would let you bypass HTML parsing entirely and get clean, structured review data. However, the exact endpoint URL and payload structure should be verified against the live site, as internal APIs are subject to change without notice. The HTML scraping approach shown above remains the most reliable method for consistent Yelp review extraction.
Sorting reviews. The sort_by=date_desc parameter in the URL ensures you get the newest reviews first. Other options include rating_desc and rating_asc. For monitoring use cases, date-sorted scraping lets you detect new reviews by comparing against your last scrape timestamp.
Handling Anti-Bot Protections and Rate Limits
Yelp is serious about protecting its data. If you fire off hundreds of rapid requests from a single IP, expect blocks. Here's a layered strategy for scraping Yelp reliably.
Rotate User-Agent strings. Sending the same User-Agent header on every request is a fingerprinting giveaway. Maintain a list of realistic browser User-Agent strings and rotate them randomly. You can find up-to-date UA strings from resources like user-agents.net.
import random

USER_AGENTS = [
    "Mozilla/5.0 (Windows NT 10.0; Win64; x64) AppleWebKit/537.36 Chrome/120.0.0.0",
    "Mozilla/5.0 (Macintosh; Intel Mac OS X 14_0) AppleWebKit/605.1.15 Safari/605.1.15",
    "Mozilla/5.0 (X11; Linux x86_64) AppleWebKit/537.36 Chrome/119.0.0.0 Safari/537.36",
]

def get_headers():
    return {
        "User-Agent": random.choice(USER_AGENTS),
        "Accept-Language": "en-US,en;q=0.9",
        "Accept": "text/html,application/xhtml+xml",
    }
Add realistic delays. Random delays between 2 and 5 seconds mimic human browsing patterns. For large-scale runs, consider a longer backoff (10 to 30 seconds) between business detail pages, since those are heavier requests that stand out in server logs.
Proxy rotation. When scraping Yelp beyond a few dozen pages, rotating your IP is essential. You can set up your own proxy pool or use a proxy rotation service. The key is distributing requests across many IPs so no single address triggers rate limits.
def make_request(url, proxies_list):
    proxy = random.choice(proxies_list)
    proxy_dict = {"http": proxy, "https": proxy}
    headers = get_headers()
    try:
        response = requests.get(url, headers=headers, proxies=proxy_dict, timeout=15)
        return response
    except requests.RequestException as e:
        print(f"Request failed via {proxy}: {e}")
        return None
Retry logic with exponential backoff. When you get a 429 (rate limited) or 403 (blocked) response, don't just retry immediately. Wait, then try again with a longer delay:
def fetch_with_retry(url, max_retries=3):
    for attempt in range(max_retries):
        response = requests.get(url, headers=get_headers(), timeout=15)
        if response.status_code == 200:
            return response
        wait = (2 ** attempt) + random.uniform(0, 1)
        print(f"Retrying in {wait:.1f}s (status {response.status_code})")
        time.sleep(wait)
    return None
Respect robots.txt. At the time of writing, Yelp's robots.txt restricts crawling of certain paths and specifies crawl-delay preferences. Always check the current directives before launching a scraper. Ignoring robots.txt doesn't just risk blocks; it raises ethical and potentially legal concerns. Responsible scraping means staying within the boundaries the site has published.
Speeding Up Your Scraper with Async Requests
The synchronous scraper above works fine for small jobs, but if you're collecting data on thousands of Yelp businesses, waiting sequentially for each HTTP response adds up fast. Async HTTP lets you fire multiple requests concurrently, dramatically reducing total scrape time.
Here's a minimal async pattern using httpx:
import httpx
import asyncio

async def fetch_page(client, url):
    try:
        response = await client.get(url, timeout=15)
        return response.text if response.status_code == 200 else None
    except httpx.RequestError:
        return None

async def scrape_urls_async(urls, concurrency=5):
    semaphore = asyncio.Semaphore(concurrency)
    results = []

    async def bounded_fetch(client, url):
        async with semaphore:
            html = await fetch_page(client, url)
            results.append((url, html))
            await asyncio.sleep(random.uniform(1, 3))

    async with httpx.AsyncClient(headers=get_headers()) as client:
        tasks = [bounded_fetch(client, url) for url in urls]
        await asyncio.gather(*tasks)

    return results
The Semaphore with concurrency=5 caps you at five simultaneous requests. This is important: blasting Yelp with 50 concurrent connections is a fast way to get every IP in your pool blocked. Start with 3 to 5 concurrent requests and increase cautiously while monitoring your success rate.
Each task also includes a random delay after completion. This prevents the "thundering herd" pattern where all five slots free up simultaneously and immediately fire five new requests at once.
Async scraping shines when you already have a list of URLs to visit (for example, business page URLs collected from the search results phase). You parse the HTML responses with the same BeautifulSoup code from earlier, since the parsing logic doesn't change just because the fetching is async.
Storing and Exporting Your Yelp Data
Scraping is only useful if you store the results in a format your downstream tools can consume. Here are three common export paths for scraped Yelp data.
CSV export is the simplest option and works with virtually any analytics tool:
def export_to_csv(data, filename="yelp_data.csv"):
    if not data:
        return
    keys = data[0].keys()
    with open(filename, "w", newline="", encoding="utf-8") as f:
        writer = csv.DictWriter(f, fieldnames=keys)
        writer.writeheader()
        writer.writerows(data)
    print(f"Exported {len(data)} records to {filename}")
JSON export preserves nested structures (like hours or review lists) that flatten awkwardly in CSV:
def export_to_json(data, filename="yelp_data.json"):
    with open(filename, "w", encoding="utf-8") as f:
        json.dump(data, f, indent=2, ensure_ascii=False)
    print(f"Exported {len(data)} records to {filename}")
SQLite is a good middle ground when you want queryable storage without setting up a database server:
import sqlite3

def export_to_sqlite(data, db_name="yelp.db", table="businesses"):
    conn = sqlite3.connect(db_name)
    cursor = conn.cursor()
    if data:
        cols = ", ".join(f"{k} TEXT" for k in data[0].keys())
        cursor.execute(f"CREATE TABLE IF NOT EXISTS {table} ({cols})")
        placeholders = ", ".join("?" for _ in data[0])
        for row in data:
            cursor.execute(
                f"INSERT INTO {table} VALUES ({placeholders})",
                list(row.values())
            )
    conn.commit()
    conn.close()
For most Yelp scraping projects, start with JSON (it handles nested review data naturally), then flatten to CSV when you need to load data into spreadsheets or Pandas DataFrames. SQLite makes sense when you're running repeated scrapes and want to query historical data without loading everything into memory.
Turning Yelp Data into LLM-Ready Insights
Here's where this tutorial diverges from every other Yelp scraping guide. Once you've collected reviews, you can pipe them through a large language model to extract insights that would take hours to compile manually.
The workflow has three steps: clean the data, format it as a structured prompt, and call the LLM.
Step 1: Convert reviews to a markdown summary block. LLMs perform best when input data is clearly structured:
def reviews_to_markdown(reviews, business_name):
    lines = [f"# Reviews for {business_name}\n"]
    for r in reviews:
        lines.append(f"- **{r['rating']}** ({r['date']}): {r['text']}\n")
    return "\n".join(lines)
Step 2: Build a prompt that asks for specific outputs. Don't just say "summarize these reviews." Be explicit about what you want:
def build_analysis_prompt(markdown_reviews):
    return (
        "Analyze the following Yelp reviews and provide:\n"
        "1. A 2-sentence overall summary\n"
        "2. Top 3 positive themes with example quotes\n"
        "3. Top 3 negative themes with example quotes\n"
        "4. An estimated sentiment score (1-10)\n\n"
        f"{markdown_reviews}"
    )
Step 3: Send it to your LLM of choice. Here's a minimal example using the OpenAI client, but any LLM API (or a local model) works:
from openai import OpenAI

def analyze_reviews(reviews, business_name):
    client = OpenAI()
    md = reviews_to_markdown(reviews, business_name)
    prompt = build_analysis_prompt(md)

    response = client.chat.completions.create(
        model="gpt-4o-mini",
        messages=[{"role": "user", "content": prompt}],
        temperature=0.3,
    )
    return response.choices[0].message.content
This pipeline turns raw Yelp reviews into structured competitive intelligence. You could run it across every competitor in a category and generate a report that maps the sentiment landscape automatically. For lead generation, you could flag businesses with declining sentiment as prospects for your service.
The key insight is that scraped Yelp data becomes dramatically more valuable when you add an LLM summarization layer on top. The scraping gives you the raw material; the LLM turns it into decisions.
Best Practices and Ethical Scraping Guidelines
Scraping Yelp (or any site) responsibly isn't just about avoiding blocks. It's about operating in a way that's sustainable and defensible.
Throttle aggressively. Just because you can send 100 requests per second doesn't mean you should. Aggressive scraping degrades the experience for real users. Stick to delays of at least 2 to 5 seconds between requests, and lower your concurrency during peak hours.
Cache responses. If you're iterating on your parser, cache the raw HTML locally so you're not hitting Yelp's servers repeatedly while debugging selectors. A simple file-based cache (save each page as {business_id}.html) cuts your request count dramatically.
Handle data responsibly. Reviews contain personal information (reviewer names, sometimes locations). If you're storing this data, apply appropriate access controls and retention policies. If you're in the EU or handling EU user data, GDPR applies.
Don't republish scraped content. Using Yelp data for internal analysis is very different from reposting reviews on your own site. The former is generally defensible; the latter creates legal and ethical problems.
Key Takeaways
- Start with search results, expand from there. A working Yelp scraper progresses through three phases: search listings, business details, then reviews. Build and validate each phase before moving to the next.
- Selector stability matters. Yelp's
data-testidattributes are more reliable than generated CSS class names. Always verify selectors against the live page and build in graceful fallbacks. - Rate limiting is your most important anti-block measure. Random delays, proxy rotation, and User-Agent randomization work together, but pacing your requests is the single most effective tactic.
- Export format depends on your downstream workflow. Use JSON for nested review data, CSV for spreadsheet analysis, and SQLite for repeated scrapes with queryable history.
- LLM pipelines turn raw reviews into actionable intelligence. Feeding structured review data into an LLM for sentiment analysis and theme extraction is a force multiplier that no amount of manual reading can match.
FAQ
Is it legal to scrape data from Yelp?
The legality depends on your jurisdiction, how you access the data, and what you do with it. Courts have generally distinguished between scraping publicly available data and circumventing access controls. Yelp's Terms of Service prohibit automated access, but ToS enforceability varies by jurisdiction. Consult a legal professional for your specific use case, and always avoid scraping behind login walls or bypassing technical restrictions.
Does Yelp have a public API I can use instead of scraping?
Yelp offers the Yelp Fusion API, which provides structured access to business search, business details, and reviews. However, the API has significant limitations: review data is capped at three excerpts per business, rate limits are relatively strict, and some fields available on the website aren't exposed through the API. For comprehensive review collection or large-scale data needs, scraping is often the practical alternative.
How do I avoid getting my IP blocked when scraping Yelp?
Rotate IP addresses using a proxy pool, randomize User-Agent headers, and add realistic delays (2 to 5 seconds) between requests. Implement exponential backoff on 429 or 403 responses. Keep concurrency low (3 to 5 simultaneous requests). Monitor your success rate and back off if it drops below 90%. Residential proxies are harder for sites to detect than datacenter proxies.
Can I scrape Yelp reviews without using a headless browser?
Yes, for most businesses. Yelp renders the initial batch of reviews in the server-side HTML, which you can parse with requests and BeautifulSoup. Pagination works through the start query parameter. Headless browsers are only necessary when Yelp loads reviews dynamically via JavaScript for specific pages, which is less common for standard review pagination.
What is the best Python library for scraping Yelp?
For most projects, the combination of requests (HTTP fetching) and BeautifulSoup with the lxml parser (HTML parsing) is the best starting point. If you need async support for large-scale collection, httpx is a strong alternative to requests. For pages that require JavaScript rendering, Playwright or Selenium are the go-to options, though they're significantly slower.
Conclusion
You now have a complete toolkit for scraping Yelp with Python. From collecting search results and parsing business details to extracting reviews at scale, every piece of the pipeline is covered with working code. The async patterns let you scale up when the project demands it, and the LLM integration turns raw review text into structured insights you can act on.
The biggest challenge in any Yelp scraping project isn't the parsing; it's maintaining reliable access. Between IP blocks, CAPTCHA challenges, and shifting HTML structures, the request layer eats more engineering time than the data extraction logic. If you'd rather focus on what you do with the data instead of fighting anti-bot systems, our Scraper API handles proxy rotation, CAPTCHAs, and retries behind a single endpoint, so your BeautifulSoup code stays exactly the same.
Whatever approach you choose, start small, validate your selectors against live pages, and build out incrementally. The use cases we covered (sentiment analysis, competitive benchmarking, lead generation) all start with the same foundation: clean, structured Yelp data collected reliably over time.


